
Bookings lets your people reserve shared resources — parking spots, hot‑desks, meeting rooms, EV chargers, equipment, and anything else that's limited and needs to be shared fairly. This article shows you, as an administrator, how to set up and look after the things people book.
You'll do all of this in the admin portal (PortalWX), under Amenities → [new] Bookings
The one concept to understand first: assets and instances
Everything in Bookings is built on two simple ideas.
- An asset is a *kind* of bookable thing — "Visitor parking", "3rd‑floor hot‑desks", "Meeting room Aurora". The asset holds all the shared information and rules: the name, photos, location, how long a booking can be, how far ahead people can book, and who's allowed to book it.
- An item/spot/seat is one individual unit inside that asset — a specific parking spot, a specific desk. Instances are what people actually reserve. An asset can have one instance or a hundred.
A useful way to picture it:
| Asset (the group + the rules) | Instances (the individual units people book) |
| Visitor parking | Spot 1, Spot 2, Spot 3 … |
| 3rd‑floor hot‑desks | Desk A, Desk B, Desk C … |
| Meeting room Aurora | (a single instance — see below) |
Why this matters: all settings and the audience live on the asset. Instances only carry a name and a position in the list. So if two things should behave differently — different booking length, different photos, used by different companies — they need to be separate assets, not two instances of one asset.
When do I create a new asset vs. add an instance?
Use this rule of thumb:
- Create a new asset when you're offering a *different kind* of resource, in a different place, or with different rules or a different audience. Examples: parking in Building A vs. parking in Building B; desks that anyone can book vs. desks reserved for one tenant; a meeting room (booked by the hour) vs. a parking spot (booked for the day).
- Add an instance when you simply need *one more identical unit* of something that already exists. Examples: the lot got a new parking spot; you added another desk to the same room. Instances inherit the asset's settings and audience automatically — they only differ by name and order.
A single‑instance asset (one desk, one room, one charger) works perfectly well — people will see its availability directly when they go to book it. You only need multiple instances when there are several interchangeable units to spread bookings across.
Creating an asset
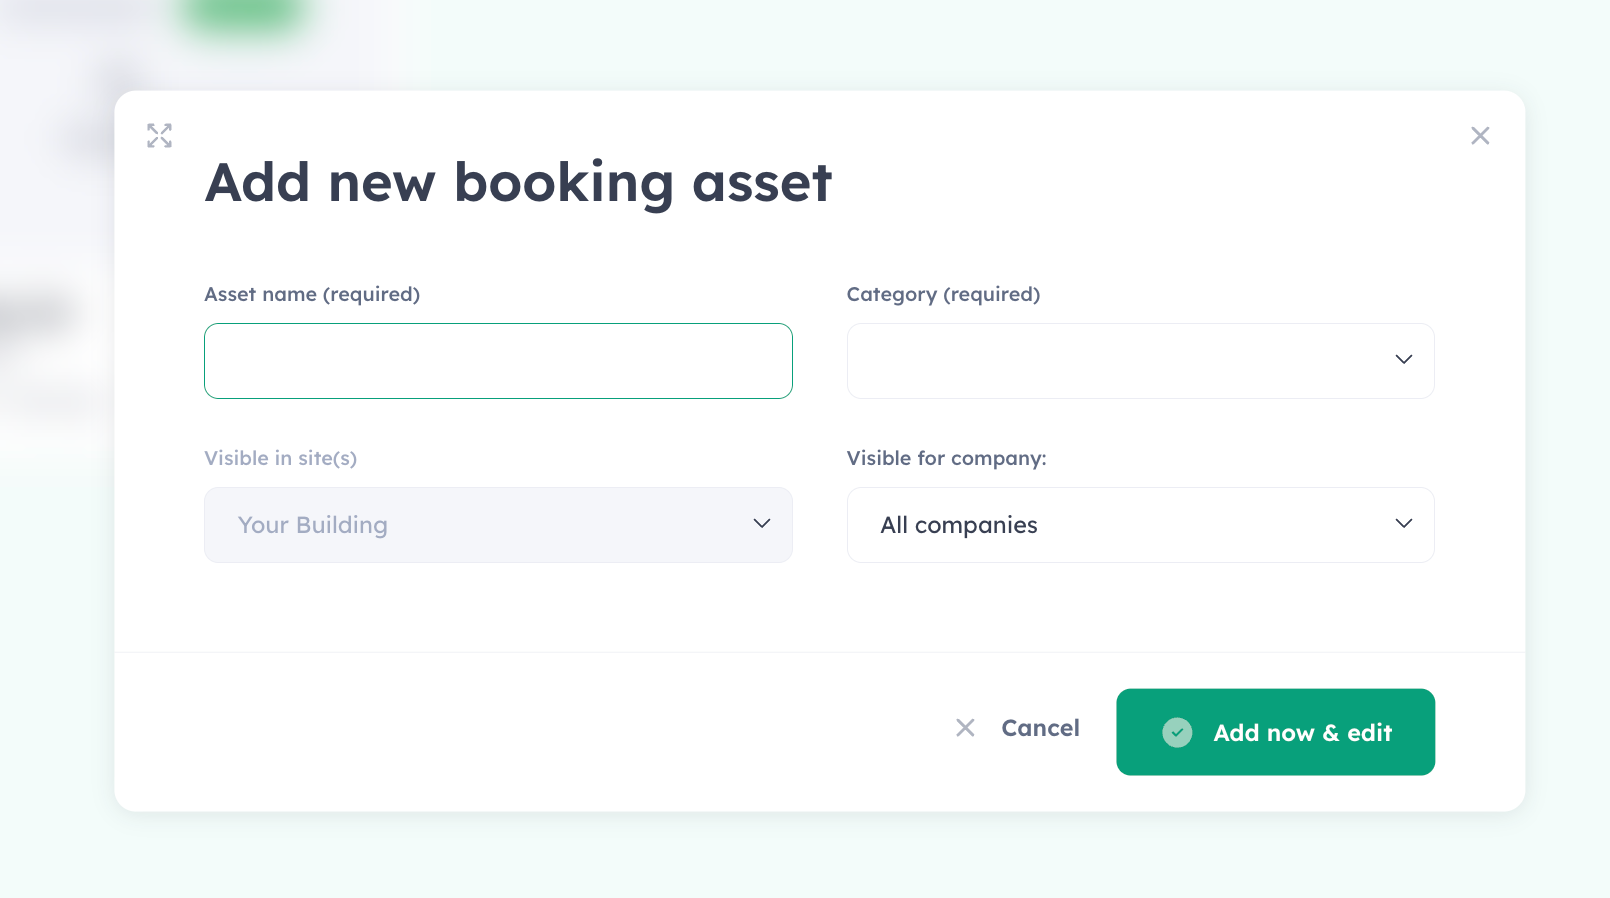
- Go to Amenities → ? Bookings and choose Create asset.
- Give it a name and an optional description. Both can be entered in each of your building's languages, so people see them in their own language.
- Choose the location — the building or floor where the resource physically is. Location does two jobs: it tells people where to find the resource, and it sets the asset's time zone (important if you operate across regions — bookings and availability always follow the asset's local time).
- Asset gets one instance by default. You can go in and add as many as needed.
- Save. Your new asset appears in the list, and you can now fine‑tune its settings, photos, audience and instances.
Assets show up as cards in the list — drag a card to change its order, which is the order people see when they browse in the app.
Asset settings and capabilities
Open an asset and you'll find its settings grouped into a few areas. Here's what each one does.
Information
Settings and what they do
- Name - The asset's display name. Can be set per language.
- Description - Optional extra detail (rules, directions, what's included). Can be set per language.
- Location - Where the resource is, shown to people as *Site › Building › Floor*. Also sets the asset's time zone.
- Categories & features - Labels that group and describe the asset (e.g. *Parking*, *Accessible*, *Standing desk*). People use these to browse and filter when they're looking for something to book. Start typing to reuse a label you've used before, or type a new one.
Photos
Upload one or more images of the resource. Photos help people recognise and choose the right spot or desk when booking.
Booking rules (time settings)
These control *when* and *for how long* people can book.
- Default reservation time— the booking length that's pre‑filled when someone opens the booking form. You choose one of two styles:
- By the hour — a default duration in minutes (e.g. 60). Best for meeting rooms and short desk sessions.
- Most of the day — a fixed daily window, e.g. 9:00–17:00. Best for parking and full‑day desks.
- Booking window— how far in advance people may book:
- Maximum advance — the furthest ahead a booking can be made (e.g. "up to 14 days ahead"). Leave it open for *anytime*.
- Minimum advance — the latest someone can book before the start time (e.g. "at least 2 hours before"). Use this to stop last‑second bookings.
- (not yet available) Available days (where shown) — choose which days of the week the asset can be booked, so weekends or closed days are blocked automatically.
Booking limits
Booking limit per person — how many bookings one person can hold on this asset *at the same time*. The default is 1, which stops someone from quietly reserving several spots for the same period. Raise it if people legitimately need more than one at once, or set it to unlimited.
| Note: this functionality is not yet available in the user interface. Please let us know if you need this.
| Note: booking for guests is coming in July 2026
Managing instances
The Instances tab is where you manage the individual units inside an asset.
> ? **Screenshot:** *The Instances tab of an asset, showing the list of instances with drag handles to reorder, rename, and the add/delete controls.*
From here you can:
- Add an instance — when there's one more identical unit to offer. It immediately inherits all of the asset's settings and audience.
- Rename an instance — give each unit a name people will recognise (e.g. *Spot 14*, *Window desk*, *Desk by the kitchen*) instead of the auto‑generated number. People see the instance name on their booking, so a clear name saves confusion.
- Reorder instances — drag them into the order you want; that's the order people see when booking.
- Delete an instance — remove a unit that no longer exists.
> Good to know: an asset must always keep at least one instance, so the option to delete is hidden when only one is left. If you want to retire the whole resource, delete the asset instead.
Reminder on asset vs. instance: if a "new unit" actually needs different rules, photos, or audience, it isn't an instance — make it a new asset.
Audience: deciding who can book an asset
Each asset has an audience — the list of companies and sites the asset is offered to. Only people in the audience can see the asset and book it; to everyone else it's invisible.
> ? **Screenshot:** *The Audience setting on an asset, selecting which companies and sites the asset is available to.*
To set it, open the asset, go to Audience, choose who it's for, and save:
- Pick by company — one of the tenant companies in your building. This is how you make, say, executive parking visible to a single tenant.
- Pick by site — the wider property or location, when an asset should be open to everyone there (for example a bank of shared desks for the whole building).
- An asset can be shared with more than one company — handy for shared resources like visitor parking.
> Important — set the audience before the asset goes live. You can freely change an asset's audience while it has no active bookings. As soon as any instance is booked, the audience is locked — this protects people who already have a booking from suddenly losing access. To change it after that, the existing bookings first have to clear: either let them run out, or, as an asset manager, cancel them. The audience then unlocks again.
>
> Everything else about the asset stays editable while it's in use: you can still add, rename and reorder instances, swap photos and descriptions, and adjust the booking rules. Only the audience locks.
Who can do what: roles
Managing assets and bookings is controlled by the permissions your admins are given. In day‑to‑day terms there are three levels:
| Who | What they can do |
| Asset manager — an admin from the company that owns the asset | Full control: create, edit, reorder and delete assets and instances; manage every booking on the asset, including other companies' bookings and bookings in the past. |
| Office admin — an admin from another company the asset is shared with | Create and manage bookings for people in their own company. Can shorten or release the upcoming part of a booking that's already running, but can't change anything in the past, and can't edit the asset itself. |
| Employee — an everyday app user | Book for themselves and view or cancel their own upcoming bookings from the mobile app. Long‑term and multi‑day bookings are managed by an admin, not from the app |
Two privacy rules worth knowing:
- An office admin never sees the personal details of people from other companies. Where such a booking appears, it shows as "Hidden user" rather than a name.
- Only an asset manager can change bookings that are in the past ("history"). Everyone else is limited to the present and future.
The permission to manage assets and the permission to manage bookings are separate — someone can be allowed to create bookings without being able to change the assets themselves. These are granted in the portal's permission settings and can be applied to a whole company or a single site.
A typical setup, end to end
Putting it together — say you're opening up the visitor car park:
- Create the asset "Parking lot A", located in Main building › Ground floor, starting with 8 instances.
- Information, add a description and the Parking category; upload a photo of the entrance.
- In Booking rules, set the default to Most of the day (8:00–18:00), a Maximum advance of 14 days, and a Minimum advance of 1 hour.
- On the Instances tab, rename the spots to match the signage (Spot 1 … Spot 8) and order them.
- Set the Audience to the tenants who get to book the parking.
- Reorder the asset in the list so it sits where you want it in the app.
People in that audience can now find and book a visitor spot — and you can manage it all from the Bookings calendar, which is covered in the next article.